Fern Stitch is also known as
Punto de helecho[ES], Point de fougère [FR], Bäumchenstich [DE], Punto felce [IT], Ponto Pé de Galinha [PT].
How to do the Fern Stitch
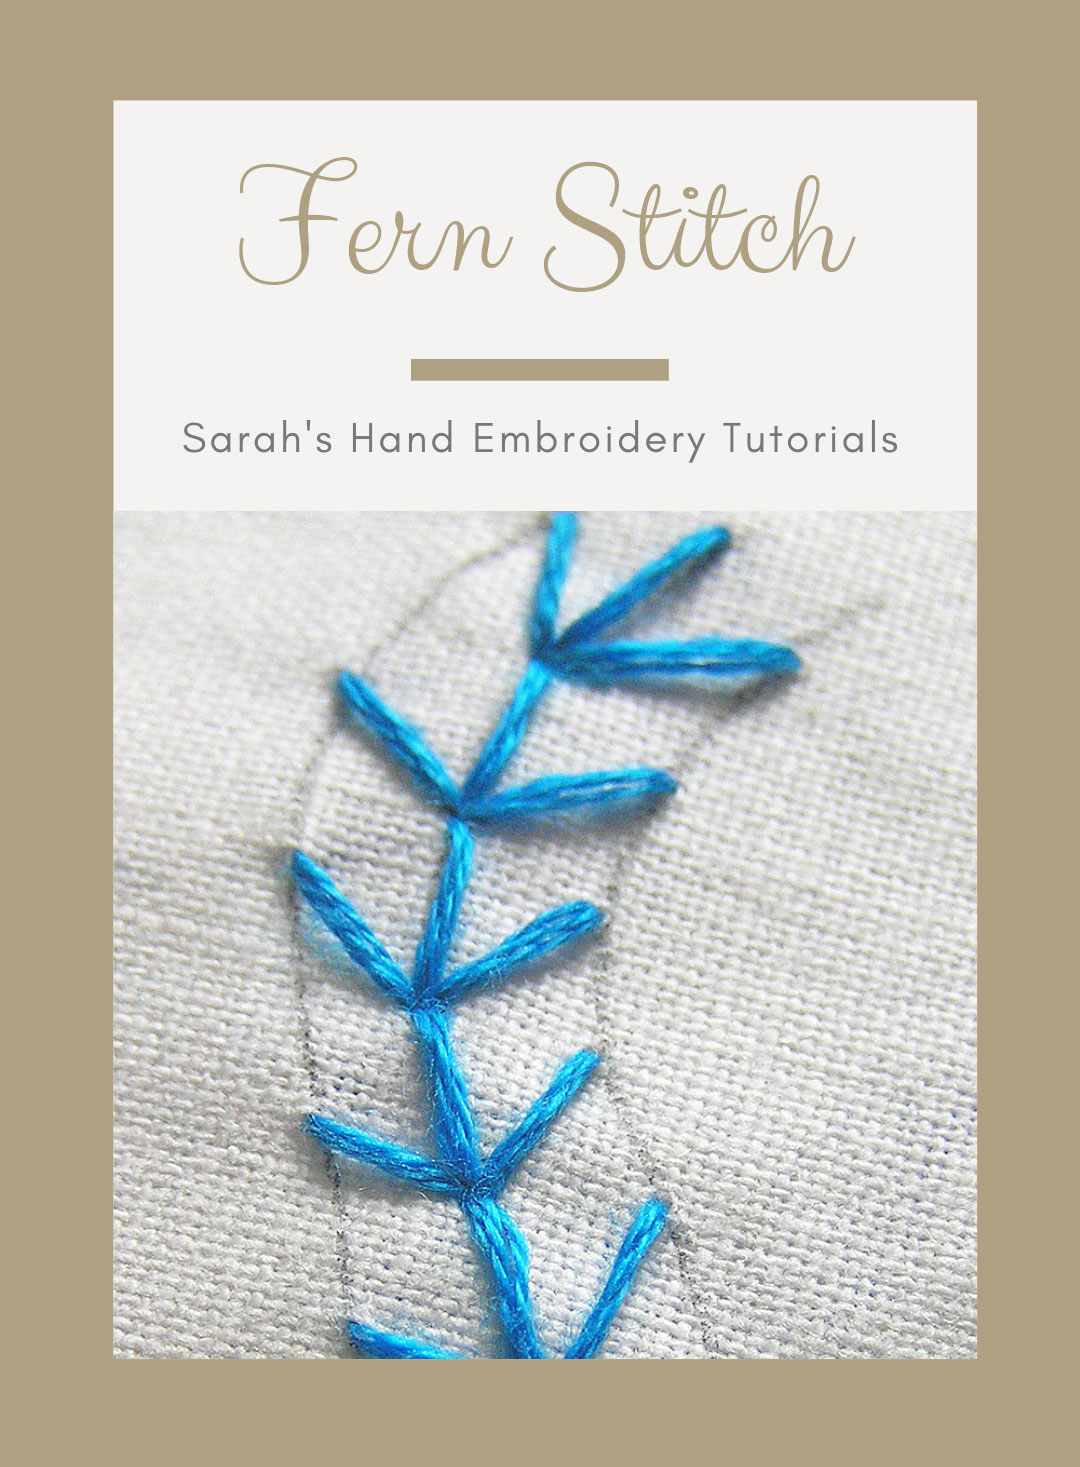
The Fern Stitch is made of series of three straight stitches. It resembles a fern leaf and so, a good stitch to do vegetal designs. You need to know how to do the Straight Stitch. I will work over three parallel curved stitch lines to bring out the effect.
 |
 |
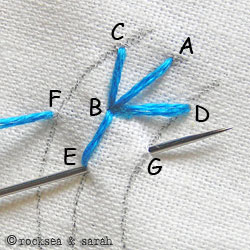
| Fig 1: Bring the needle out from A and take it in through B, both points which lie over the second stitch line. | Fig 2: Now, Take the needle out through C, a point which lies on the first stitch line. This point lies a little higher than the point B (about 45 degrees). |
 |
 |
| Fig 3: Now, take the needle in through the point B. Then, bring the needle out through point D, and take it in through B. This finishes a set of three straight stitches. | Fig 4: Bring out through E and back into B. Follow the illustration to continue. |
 |
|
| Fig 5: A finished portion looks like this. |
Learn to do Fern Stitch in 2 minutes!
Related Projects
Do you want to know where and how to use this stitch? Check out the projects below and learn more. Make something beautiful today❤️
Use the Fern Stitch on a pattern
Visit and Subscribe to Sarah’s YouTube Channel
More stitches from the Straight Stitch Family
|
|
Learn the Fern Stitch along with 305 other stitches from our 600-page eBook.


 Sarah has been researching and sharing hand embroidery lessons for over 17 years, making it accessible to everyone around the globe.


Sarah, I enjoy watching your videos and have learned so many new stitches from your tutorials. Are the Three Stitches At a Time (3SAT) patterns still available to download?
Hi Candy,
Thank you. It’s wonderful to know that you like learning from our videos tutorials! Of course, the patterns are available to download. Please check this page: https://www.embroidery.rocksea.org/projects/3sat-patterns/
For our patrons on Patreon, I have provided the pattens in PDF format too. 🙂
thank you so much!
Thank you Sarah.
See now i am very clear of all the step and easy to remember of how to stitch it. Fast and simple. How i wish i should learn it when i was a kid. Love you.
Thank you, so much Ms. Khoo Hooi Bin!
Hola me encanto la explicación muchas gracias bendiciones😊😘
Thank you, Rosy! ❤️
Thank you for a great explanation. I was looking online for a similar idea and really appreciate it ‘
Machinesembroidery
estou adorando ver seus pontos de bordado estou aprendendo muito….mais estou bem devagarinho muito obrigada….beijos…
Thank you so much for these stitch tutorials. I’m brand new to this & thanks in no small part to your fantastic site I’m picking up new stitches rapidly!
hi Sara…I think you are so special for sharing with us…tks
APRENDI A FAZER ESSE PONTO AGORA….MARAVILHA.
so glad found your stitches through pinterest. thanks, Sarah! 🙂
I’m looking up types of stitches to embroider a pillow for my bf for xmas, and this is perfect because my name is Fern! 😀
This is really a good site. I thought to learn from a trainer. But after seeing this, I think trainer is not at all required. Thanks for your work and please do keep it up
Dear Sarah..
Thank u for this work. It is very helpful.. I love to do these kind of stichings. In fern stich, completed straight 3 stiches. then from where I can start the next stich.. I’m in confusion.. Please do help 🙂
Check fig 3 to understand! Bring the needle out from E and go in through B.
hi
nice work.wanna to knw is it gujrati n sindhi stitch r same
This site is a great help for me. slight confusion – at fig.3 we bring the needle out from point D. at fig.4 again the needle is coming out from E. could you please clear this point?
Dear Apoline,
In fig 3, you bring the needle out through D and go back in through B. Then, you bring the needle out through E again.
I have made the ‘correction’ in fig 3. I hope this description is better. 🙂
Hi Apoline,
In fig3, once you come out from D, you go in through B.
Then, in fig 4, you come out from E.
I hope this helps!
Disfrute mucho con tus diferentes puntos. Felicitaciones y lo frecuentare mil gracias
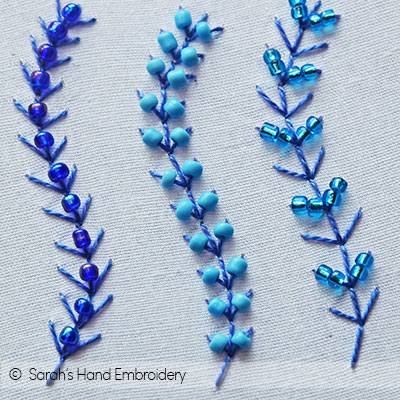
Hi Sarah, i need one help from . Please tell me how to put beads in different stitches
Hi Chaitra, after you come out from the fabric, pass t he e needle through the beads, and then pass the needle into the fabric. This way, the stitch will hold the beads.
Hope this helps!
OLA PASSEI PARA DEIXAR UM RECADINHO PARA VOCE, MORO NO RIO DE JANEIRO , BRASIL, E QUERO MUITO TE AGRADEÇER POR SER TAO GENEROSA COM TODOS,COMPARTILHANDO SEUS TUTORIAIS, QUE DEUS TE ABENÇOE MUITO, BJUS NO SEU CORAÇAO
Edileine Almeida
the way of teaching is very easy and it looks very exciting.
hi sarah
pls reply me
Dear Uzma,
Firstly, sorry for being late to respond. I was away from my laptop for more than a month due to travels.
The sindhi embroidery tutorial is in the making and might take a little while before I make it available. It is ok to do this embroidery on bedsheets and pillow covers. It should look wonderful. If the bedsheet will be used often, then it will endure more wear and tear. I would advise to use it on a bedsheet that will be not used daily. 🙂
Hi sarah gud 2 see ur stiches i have learnt lot of stitches. Now i want to learn sindhi embroidery will u teach it please and one more thing. Is it a gud idea to do sindhi on bedsheet n pillow cover ?
Hi Uzma, it might take some time for me to research and make Sindhi embroidery tutorials. But, I will keep your request in mind. Thanks.
hi sarah, i would like to join the embroidery classes, can i have the class details and your contact number.
Dear Monica,
You can check this page fro some details, including contact information.
https://www.embroidery.rocksea.org/reference/summer-workshop/
Thank you for the basics, again! I learned at age 18 and am now 65. I am a bit rusty, but am willing t learn again. Thanks again, Margie
like embroidery would love to learn different kinds of stitches from you. happy that i came across you through pininterest.