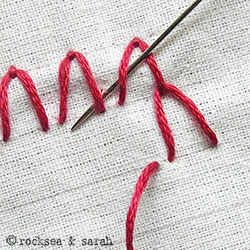
About Fly Stitch
This stitch is just an inverted version of the fly stitch. You will be making only one row of the inverted fly stitch. The subsequent rows are made by just looping it into the previous fly stitches! This makes very good motif fillings with texture. This stitch also gives you a lot of scopes to experiment with different colors. Try doing each row with different colors or shades to get a unique look every time.
How to do Fly Stitch
You need to know the Fly Stitch to continue with this tutorial. You can start working this stitch from left to right.
 |
 |
| Fig 1: Make a row of fly stitches with a short tail and slightly spaced from each other, as shown. Make sure they are inverted and look like an upside-down ‘V.’ After finishing the last fly stitch, turn around and come out from the next row, as illustrated. You can also start the next row fresh with a different colored thread. | Fig 2: Take the needle in through the first leg of the last fly stitch in the previous row, and take the needle in through the fabric to make an inverted V. Come out again and take the needle under the two legs of the previous fly stitches, as shown. Keep up with this procedure. Make multiple rows of such fly stitches to fill the motif. |
 |
|
| Fig 3: A filled area would look like this. Try experimenting with different shades and colors for each row. |
Fly Stitch Sample

Use this stitch on a pattern.
Visit and Subscribe to Sarah’s YouTube Channel
 Sarah has been researching and sharing hand embroidery lessons for over 17 years, making it accessible to everyone around the globe.


Love your stitch tutorials. Very clear and manageable. How can I get hold of your Hand Embroidery E-book? I live in Belgium.
Hi Mieke,
Thank you for your kind words. Please check a list of our eBooks here: https://www.embroidery.rocksea.org/product/
I hope you find one for you.
Sarah
I love your tutorials they are so clear and very easy to follow for me, a new person. Your a very good teacher with good pictures. I saved you in my favorites so can reference you when I need to. Thank you, Cathy.
Thank you, Cathy. 🩷🩷