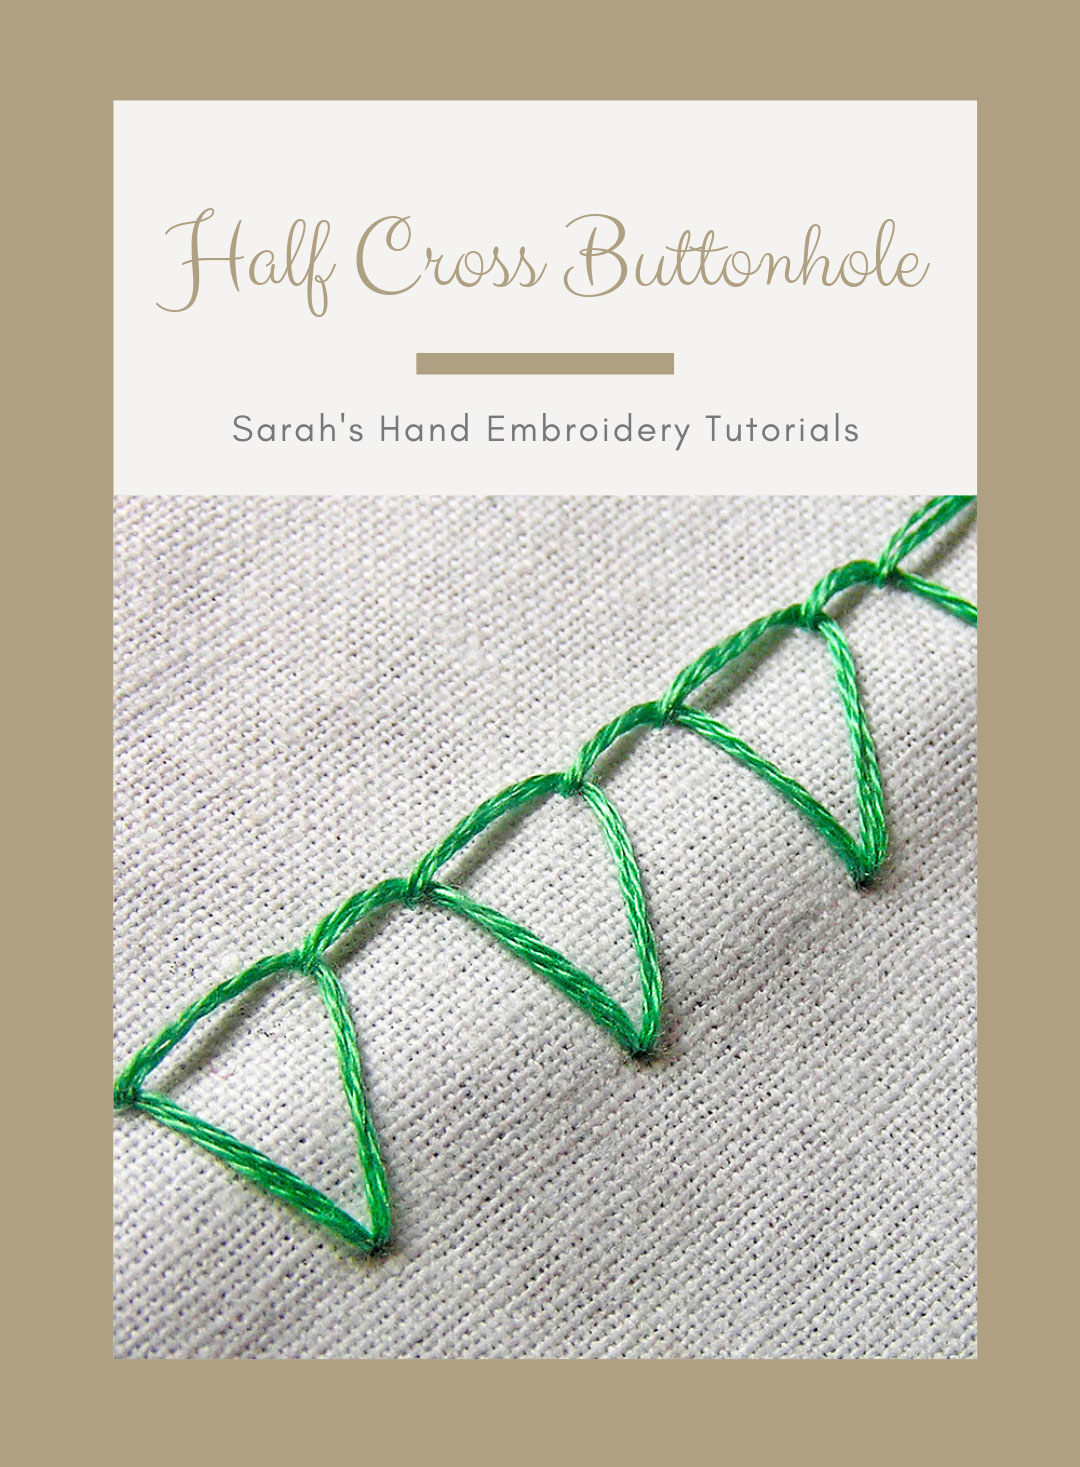
Closed Blanket Stitch is also known as
Half Crossed Blanket Stitch [EN], Punto de festón cerrado [ES], Point feston fermé [FR], Geschlossener Langettenstich [DE], Ponto de casear fechado [PT].
How to do the Closed Blanket Stitch
As the name suggests, this Blanket Stitch is a closed variation but forms a beautiful pattern to edge thick fabrics. Knowing the Blanket Stitch will be an advantage. I will work between two horizontally parallel stitch lines.
 |
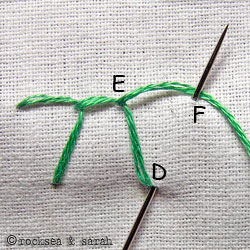 |
| Fig 1: Bring out the needle through A. Now put the needle in through B, as shown. Take the needle out through C. Note that the points B and C are placed diagonally with each other, unlike in the normal blanket stitch. We continue with this ‘diagonal’ approach throughout. |
Fig 2: Now, Take the needle in through D and E, again diagonally placed to each other. Then, take the needle in through D and bring it out from F as shown. This gives the blanket stitch a ‘closed’ look. |
 |
|
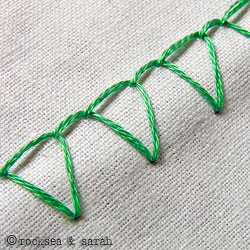
| Fig 3: Continue this process for the entire row. A finished row would look like this. When done as an edging, both sides of the fabric would look the same. |


I am looking for an edging for a quilt that I am making. I think this might do it. The hood above from Kory and Susan’s sample look like the may be done on a thicker fabric. What floss or thread should I use? This is for a throw blanket that will be used a lot.
Finally got both sides of the repair area on the wedding dress to unload. Hope this helps. Anna
Hi Anna,
Thank you for the photos of the stitch. I tried to look at the photos and kept your description of the stitch in mind. This could, probably, be the Sailor Stitch, which combines the Blanket Stitch and the Chain Stitch. Here is the link to the tutorial: https://www.embroidery.rocksea.org/stitch/chain-stitch/sailor-stitch/
Just ensure that the stitch is done in a doubled thread instead of a single one as shown in the tutorial.
Let me know if this helped.
HELP! Repairing a vintage Mexican wedding dress. Had to remove part of the blanket stitch on the neck to repair the tears. Can’t find a tutorial of the xact stitch, but will up load a pic. It is not the same on the back as the front.


Hi Anna,
Is this the wedding dress? It is beautiful and so colorful! I think I know which stitch you are talking about. I don’t have the tutorial uploaded just yet, even though it is available in my eBook. How about I upload it on Friday or Saturday? I need time to prepare it for the website. Thank you!
Regards,
Sarah
Hi, and thanks for responding. No, that’s a pic of an example. Hopefully I can uploads pics of the actual dress. I was wrong the stitch is the same on the back side as the front6t. It appears to have chain or other stitching on the closed (long stitch) side. I can’t seem to figure 0ut today how to upload the photos. Is it possible to email to you?
Sure! Please send it to sarah@rocksea.org .
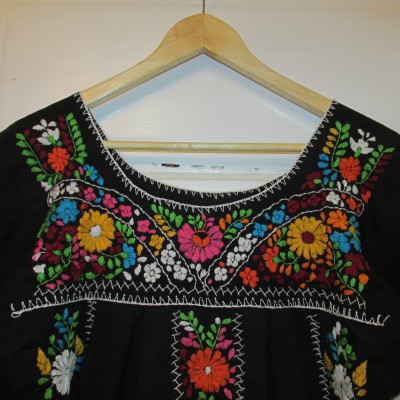
I just fixed the edging on the neckline of a similar garment. Even though the majority of it was embroidered, the edging, which looked like a closed blanket stitch, with chain stitches in-between, turned out to be a crocheted blanket stitch, with chains in-between, which is why it came undone in the first place. Hope this helps someone. I looked for a couple of days, and tried several types of embroidered blanket stitched before coming across a youtube video with the solution to the problem.
Hi Sherry. This is fantastic! Thank you so much for this information. This will definitely help many, including me. 🙂
You are welcome; glad I could help. Here is a photo of the fixed dress; the neckline was where the problem was.

Wonderful! Thank you, Sherry.
There is a free tutorial on “Maggie’s Crochet”, in which she demonstrates this stitch. It is called “Baby Blanket Edging Tutorial”. “Tiger Tape” is used to evenly space the stitches, and a tiny crochet hook or a tailor’s awl is employed to make the holes in the fabric.
Thank you, Sherry. I am sure this will help many. 🙂
Hi Sarah,
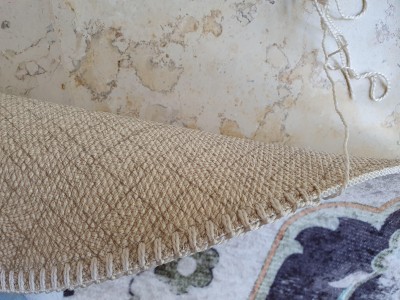
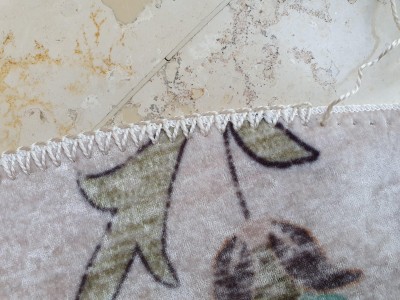
Any chance you can help me fix my beloved carpet?


Hi,
I had the exact same question but I was trying to figure out how to duplicate the blanket stitch on a throw. I found this you tube video that shows how to do it by hand. Like your rug, my throw was probably edged using the Merrow stitch machine.
https://youtu.be/ufcRnafSWxY
Hi Sharon,
Thanks! you are correct, it does look like a traditional merrow stitch. The link you sent is close to it but is not exactly that.
I hope i’ll be able to find instructions for the traditional merrow stitch be hand.
Hi Sary,
I was finally able to make a photo tutorial of the stitch this resembles.
Try this page: https://www.embroidery.rocksea.org/stitch/blanket-stitch/merrow-stitch/
I hope this helps!
Hello Sarah,
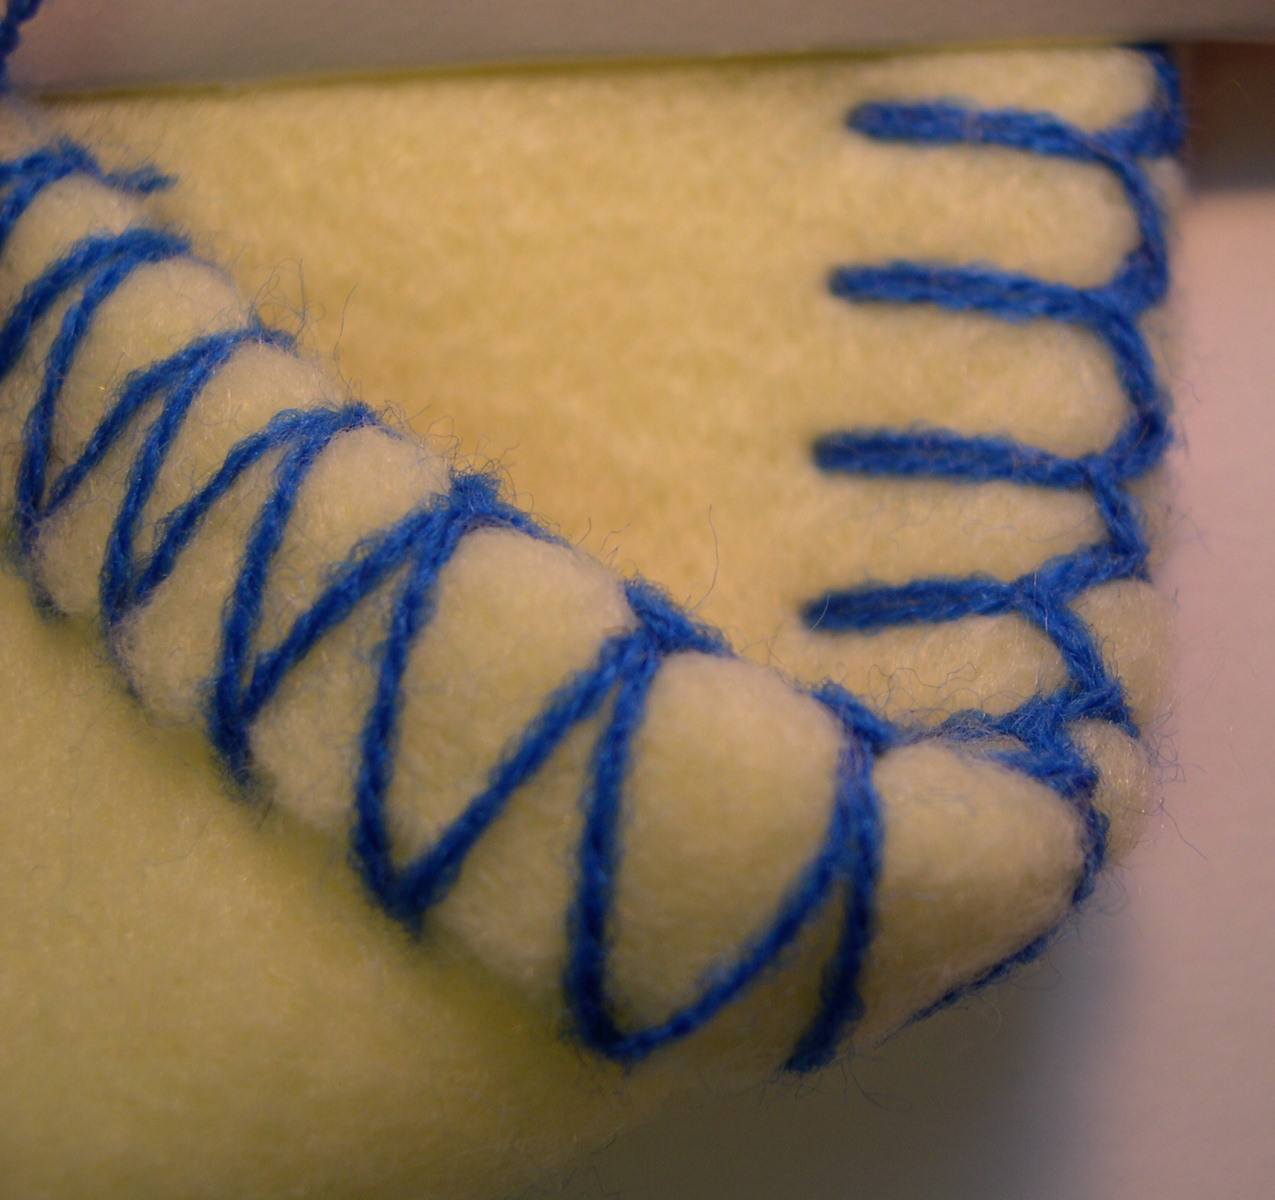
I’m looking for a specific stitch but I haven’t been able to find it on the internet. The closest I’ve found is a Merrow Rolled Blanket Stitch, however this stitch is done with a machine; I would like to do it by hand. Another question is, does the Half Crossed Blanket Stitch look the same on both sides? Also, have you ever heard of a Half Flat Crotchet Stitch. I found it once on the internet but now I can’t find it.
Thanks,

Hi Susan,
Half Crossed Blanket Stitch does look the same on both sides. To my understanding, most blanket stitch variations look the same on either sides of the fabric. Does the stitch you are looking for look different on both sides? ‘coz I see that it does in the picture you attached here. If I get more information on it, I will certainly let you know here. As of now, my feeling is that it is made by a machine, and the technique it follows need not quite be the way blanket stitches/ Buttonhole stitches follow when done by hand, creating this stitch result.
I don’t know the name of this stitch, but I can follow the thread path and tell you how it is done (and that it can only be done by hand—I can’t see how a machine could do it). Basically, you start with an anchor stitch somewhere at the end shown at the top right corner of your photo, and then:
-bring the needle out on the right side of the fabric, away from the edge, go up and over the edge, under the anchor, and back around to the RS, going in the same hole
-angle the needle from that hole, so it comes out the wrong side of the fabric where the base of the next stitch begins
-go up, over the edge, underneath both threads of the previous stitch, and back to the WS, going back into the same hole
-angle through the fabric to the base of the next stitch
-and so on.
Thank you for this information, Kate. 🙂
No problem! I just hope it is right, as I didn’t actually try it with thread in hand. 🙂
Hey Kate,
What are the chances you have some kind of pictorial on this process? Lol – I need the same stitch and this is the only place online that’s come close. Everywhere else recommends the merrow or some kind of buttonhole stitch that splits two threads…The one I need is a single thread. I have one thread, unraveling from an edge, easily pulled out.
Anyways, I’m sure everyone’s moved on from this thread but I’m at a loss. And not very versed in this kind of thing.
Help!
I have been trying to replicate a similar stitch, photo attached. Any ideas on how to do it. Seems to be a combo of closed blanket stitch and regular blanket stitch.
Hi Kory,
Try this: https://www.embroidery.rocksea.org/stitch/blanket-stitch/merrow-stitch/
It is a combo of closed blanket stitch on one side and regular blanket stitch on the other.
Hey Sarah! Thanks for the sweet website and tutorials. I was wondering if you have considered showing some of the blanket stitches as edging, as they can be a little hard to start out with. I’m sewing shorts by hand and plan to use the closed blanket stitch to finish my hems, but can’t quite figure out how to work the thread correctly.
Hi,
You have really explained all the stitches very beautifully….. i am interested in learning it… thanking for creating such a bful, well planned website…..
Thank you, Megha!😘
Hi,
After “F” the first triangle is complete; but where and how do you begin the next one? What is the next step?
Thanks! I’ve been searching for this stitch and have only found it here. :^)
Oh, wait I think I know! You just repeat the D to E, then D to F! Got it! ;^)
🙂
hi sarah, your site is very useful , helped me a lot to understand new stitches… thanks…. a lot.. can u add some designs to practice embroidery?
Dear Saleena,
I am happy that you are enjoying our tutorials. 🙂 It might take some time before I can upload some designs for practice, but you can google out soem nice designs.
Hi Sarah,
Happy new year!!!!!
I am new to this site of yours, was just googling things about embriodery, came to know about this site.
I know hand embriodery but then due to my work schedules, had stopped doing it since few years.
I want to start again and have started practicing a bit.
Actually wanted some help from you….. 🙂
I have a plain dark coffee colour satin skirt, i want to do some embriodery on it but confused about what kind of designs can be done on it, what colour????
If you cud help me out that wud be gr8 🙂
my mail id is sushbel.31@gmail.com
By the wat, it really a Wonderful site!!!!!!!!
Gr8 work…… 🙂
Dear Sushma,
Happy to know that you are picking back upon your hand embroidery skills. 🙂 I hope you find our pages to be of good support.
Now, deciding for you, I can suggest doing kasuti work with silk or 3 strands of anchor cotton on your satin skirt. It is easier to do and can be of great effect. Try a light colored thread like, light brown or cream. You can later add some mirrors or sequin border to it. If you want some floral designs, try easier stitches like the holbein or back stitch, stem stitch or even chain stitch. I hope this has given you some idea.
Once you finish your project, we would like if you could share it with us by uploading it along wiht your comment. 🙂 Best wishes.
Hi Sarah,
thanks for your reply.
Sure when im done with the work on my satin skirt, i will upload it. 🙂
Sarah wer r u put up? I am interested in learning al these things…
Dear Sindhu,
Thanks for your wishes and I wish the same for you and your family too. 🙂
We are put up in Pune.
Hi Sarah Wishing You And Your Family A Very Happy And Prosperous New Year…. 🙂
Hi,
Wishing u a successful,and creative 2012…..
happiness always,
rajis
Thanks Raji. Wishing you and your family the best in 2012 and always. 🙂