What is an embroidery hoop and how to use it?
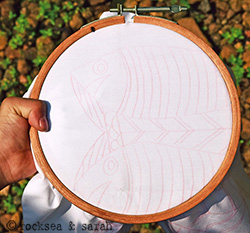
Though a hand embroidery hoop is not always necessary, it can be extremely helpful. It keeps the fabric taut and firm helping in making the stitches lay well over the fabric. Also, it minimizes our effort in managing the fabric, making our stitching experience much better. I suggest using the 4″ or 6″ embroidery hoop for beginners. Using the hoop is very easy. A hoop is made of two rings, one slightly smaller than the other. The fabric would sit between these two rings which will hold it taut. The most commonly used hoops are wooden and bamboo. Here is how to use the hoop. But, first, you need to trace the desired pattern over the fabric and keep ready. Then, separate the two rings from each other- you can do so by unscrewing the nut on the bigger ring just enough. Do not unscrew all the way out! The video will talk about the embroidery hoops and how to use the four most commonly used hoops these days.
 |
 |
| Fig 1: Place the smaller or inner hoop on a surface. | Fig 2: Next, place the fabric, face up (with the pattern facing you), on the hoop. Position it in such a way that the portion you want to stitch lies within the ring. |
 |
 |
| Fig 3: Now, loosen the bigger or outer hoop using the screw given on one side. Then, slip it over the fabric and the smaller hoop. Then, tighten the screw just enough to make the fabric tight and taut. If the fabric seems loose inside, pull it on the sides to tighten it. | Fig 4: This is what a hooped fabric looks like. No matter where you carry it, the fabric will remain tight. Once you have finished stitching a portion of the fabric, you can remove and hoop the fabric again in the next position. |
Learn to use the different kinds of hand embroidery hoops.
Learn more about Hand Embroidery along with 306 stitches from our 600-page eBook!

 Sarah has been researching and sharing hand embroidery lessons for over 17 years, making it accessible to everyone around the globe.


Hi, Can you tell me if i m using small hoop for bead embroidery and after stiching if i move the hoop which will cover my stiched portion also so it will not damage my bead work ?? & what is the solution for that ??
Hi Teena,
This can be tricky. It is usually good to have hoops of different sizes to suit your patterns. Another suggestion is to try working with beads without the hoop. Let me know it this helped.
Hi Sarah loved you tutorial of climbing roses. The way you did french knots with 6 strands and 3 strands was very helpful. Re hoops do you use a chair hoop ie you sit on the extension of the hoop. Is that the way you are able to demonstrate the stitches so clearly. Once again many thanks IZ
Hi IZ. Thank you, so much. Yes, I use a chair embroidery stand. It is only to hold my hoop. I stand to create the video. 😀
I am truly amazed that you stand to create the videos. The concept of standing to embroider is something I have never seen. I was taught to embroider by my grandmother some 60 years ago and since then I have only seen seated embroidery. Once again many thanks, the climbing roses is beautiful. One more thing what is the difference between twisted chain and rope stitch, they look very similar. Best wishes IZ
Hi IZ,
I stand and embroider because that is all the space I have in my tiny studio! I place the camera, lighting, and my embroidery hoop on my small table.
Of course, if I were not embroidering to create videos, I would sit comfortably on the couch or at the table and use just my embroidery hoop (no embroidery stand) to stitch. I use more of he sewing method for my stitches and using only teh embroidery hoop helps with that. Sometimes, I don’t even use the hoop!
Hi. Can you tell me what the best way to use a hoop as a frame for my embroidery so that it looks neat. Never done this before. I’ve always framed my work.
Thank you
do I need stabilizer on the back of the embroidery in the hoop?
Hi!
If you are using regular non-stretchable fabric, there is no need to use a stabilizer. A stretchable fabric like the ones used for t-shirts need a stabilizer to keep the fabric from stretching during the stitching process. I hope this information helps.