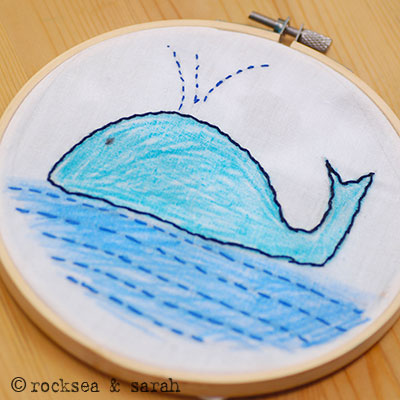
Lesson 1: How to draw, color, and prepare the fabric
This lesson will guide you on how to draw, color and get your project ready to stitch. Take note that younger kids might need help to draw/ transfer the pattern, hoop the fabric, and iron the colored pattern.
But first, be sure to go through The Introduction to an idea of this project and understand what to expect while doing this mixed media project with the kids.
Let’s begin!
 |
 |
| Fig 1: Get your fabric ready and make sure it is washed and ironed. Use a pencil to draw any pattern over it. You can transfer the pattern from somewhere too. Remember to keep the pattern smaller than your embroidery hoop. I have traced around my embroidery hoop to help me guide with the size. | Fig 2: Now, hoop the fabric. This is an optional step but strongly recommended as I have experienced that hooping keeps the fabric taut making it so much easier and less frustrating for the kids (for anyone!) to use the crayons over it. If you need guidance with hooping, check HERE. |
 |
 |
| Fig 3: Now, fill in the colors using the crayons. If the fabric is not hooped, stroke the crayons in one single direction to color. Using the colors back and forth as on a paper might not work all that well. If the fabric is hooped, color as you please. | Fig 4: Next, remove the hoop and place a parchment paper over the colored pattern making sure it covers the entire pattern. On a high heat setting, iron over the pattern. Do not steam iron. The idea is to melt the wax onto the fabric and make it smooth. Please make sure this is done by an adult or under the supervision of an adult. |
 |
 |
| Fig 5: I sometimes iron it until I could smell a bit of wax, or when I start seeing the wax smudges on the paper. When you remove the paper, you might see the color smudges on the side that touched the fabric, as shown here. That is perfectly ok. | Fig 6: Now, your pattern is ready to be stitched over! Notice how the surface is smoother. Ironing also makes sure that the crayons do not start smudging when you stitch. You can now hoop the fabric and get it ready for stitching. |
Check the other lessons here
If you need guidance with the basics of threading, knotting, hooping, or tracing, check HERE.


 Sarah has been researching and sharing hand embroidery lessons for over 17 years, making it accessible to everyone around the globe.


