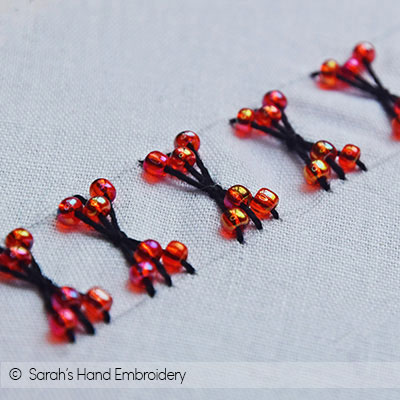
How to do Bead Embroidery with the Sheaf Stitch
The Sheaf Stitch can be used wonderfully to apply beads. Use it to scatter around the fabric for texture and decoration. Play around with colors and lengths of stitches for new look each time.
Sample 1: Beads on the vertical stitches
 |
 |
| Fig 1: Start by making the first vertical stitch. Slip in two beads in it. | Fig 2: Do the same for the next two stitches. |
 |
 |
| Fig 3: Move each bead to both ends. | Fig 4: Now bind the three stitches together. |
 |
 |
| Fig 5: Continue the process. | Fig 6: This is a portion of the Sheaf Stitch with the beads only on its vertical stitches. |
Sample 2: Beads on the tie of the Sheaf Stitch
 |
 |
| Fig 1: Make the three vertical stitches. Come out from the middle to bind these stitches. Slip in a bead and take it in to bind the three stitches. | Fig 2: This is how a portion of this sample looks like. |
Stitch used in this project

 Sarah has been researching and sharing hand embroidery lessons for over 17 years, making it accessible to everyone around the globe.


This stitch would make the cutest little spiders with a larger center bead! Thank you so much for these lovely clear instructions. Your site is a treasure.
Perfect! That is a great idea, Debbie.
This stitch would be beautiful when embroidering snowflakes using little pearl beads and white floss or with little blue beads and blue floss! Will be using this stitch on my hand made Christmas cards!!!!
Thank you
Yvonne
What a beautiful idea! I can already imagine how pretty it is going to look. Talking about snowflakes, check out our latest video on snowflakes: https://youtu.be/YU8YTOigW3Q 🙂
Lovely arrangement. I like the staggered beads.
Thank you, Maureen.
Hi. Sarah’s.
Good morning. V v beautiful. Yes I will try it on my dressed collar.
God bless you always. Amen.
Thank you, Ms. Khoo hooi bin. 🙂 I hope you are keeping well. Will look forward to seeing how it has turned out!