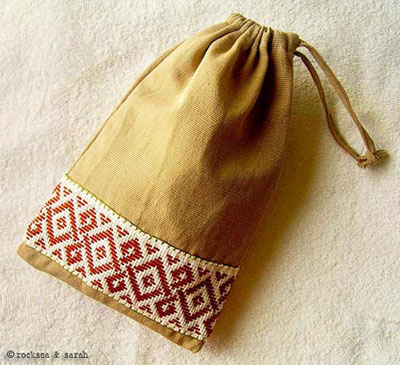
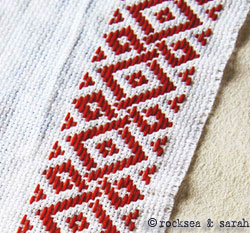
This lesson will teach you how to go about doing pattern darning, with all possible considerations and techniques, along with some hints and tips. Go through the lesson completely at least once, and in the sequence given to understand the whole concept of pattern darning. You may later use this as a reference to your own projects. For easy reading, I have divided the lessons into various topics and the explanations are given point-wise.
Stitch to know:
Darning Stitch
Fabric and threads:
1. Even weave fabric is the best to do pattern darning, as it makes the counting of each row easy and helps to bring out perfect geometrical designs though this is not at all a must. To avoid frustrations, try to choose a fabric that is not too tightly woven and has enough space for the needle to pass through.
2. Use threads that are not too slippery or lightweight, so that it does not sag after the stitch is done. It is best to use a bit thicker thread than the background thread to give the pattern a good ‘coverage’. Else, use a thread of the same thickness as that of the background.
Deciding on a horizontal or vertical pattern-
A pattern can be done either horizontally or vertically.
 |
 |
In pattern darning, threads show up substantially on either side of the fabric. So, we have to look at the backside of the fabric with the same importance as the front. Longer stitches (more than five or six squares) should be avoided, on either side. Longer stitches can cause a nuisance and catch on things. They also tend to loosen easily, spoiling the even tension in the design.
While looking to chose a pattern, see if any long stitch occurs while doing it vertically or horizontally. This will help you to decide on how to work a pattern.
Making patterns ‘workable’
For patterns that might be impossible to work on, a minor change could do the trick. For example, a diamond-shaped motif can be too wide and cause long stitches. This can be corrected by interrupting it in the middle with a small dot. So, one long stitch can be broken into two shorter stitches with a short gap in between.
Pattern darning can be done with an intention to make it reversible too. This means that the back of the design will look as good as the front, but not exactly the same. This applies to the fabric which might be used either way, like a towel. To make a design appropriate for a reversible effect, we can add a minor change to the entire design.
Technique of sewing
1. Darning stitch is the only stitch that we use in this embroidery. We can go either horizontally or vertically to do the patterns. The stitches are done row by row. Usually, the back and forth method is used. In others, where the design runs from end to end of the fabric, it is preferred to start new rows from the same side of the fabric and end at the same side. This minimizes the chance of running out of working thread in between the design.
2. While doing the running stitch, we tend to ‘sew’ or run the needle through the fabric several times before pulling it out. Though this is fair to quicken the process, it might distort the fabric too much when it comes to pattern darning. So, it is best to ‘stab’ and not ‘sew’. Take each stitch at a time and pull the needle out completely for each time it passes through the fabric.
3. Take each row at a time, be it horizontal or vertical. Do not think of how each stitch falls on the entire design.
4. Try not to pull the thread too tight or keep it too loose. Keep an even tension so that the thread falls smoothly over the fabric. You can try to pull the fabric slightly after the completion of each row, so as to loosen the tension of the stitch in that row.
How to begin and end
There are a few ways to hide the ends of the stitch so as to keep the backside of the fabric neat and reversible. You may use whichever suits you the best.
1. Tie a knot to the end of the working thread and push it through the fabric at a small distance away from the area of the design. Now start working on the design. Be sure that neither the knot, nor the thread from the knot to design is covered by the design. Once the design is completely done, cut off the knot. Take the remaining thread through a needle and weave it into the back of the pattern. This method is especially good for single motifs or self-contained spots and patterns.
2. Another way of hiding the ends under the worked thread is the one used in the ‘blackwork’ embroidery style. Here, three or four smaller running stitches are made over which the longer stitch is made.
3. If you are working the thread from one end of the fabric to the other, you can start and end the stitch at the edges, where it is possible to hide it under the hems or seams. This method will also allow you to work each row with a new thread.
How to turn
1.When we work back and forth on a design, it will be useful to pay attention to the way the turn is taken. If we have to turn by going down the fabric and coming up again with a single fabric thread away, it tends to pull out and look unattractive. However, patterns with diagonal, zigzag, or irregular edges can be managed to be worked on back and forth easily as the working thread will pass under at least two fabric threads between the end of one row and the beginning of the next.
2. Make sure not to pull the threads too tightly while starting a new row. A hint would be to pull the fabric slightly after finishing each row to loosen the tension in the stitch.
3. To overcome the problem of turning in designs with straight vertical edges, we can get a bit tricky. Try working every alternate row of the pattern. This way, we can pass the working thread under at least two fabric threads before beginning with a new row. Then, we go back and work on every row we skipped. The difference will be shown only at the edges, but that is not too bad to bear. 😉
Next, go to the other tutorials of Pattern Darning:


 Sarah has been researching and sharing hand embroidery lessons for over 17 years, making it accessible to everyone around the globe.


